Wednesday, March 27, 2013

Chocolate Oreo Cream Cake


 I admit, I cheated a little when it came to this blog post because this wasn't the first time I have made this cake. I made it over a year ago for a friend of mine's birthday. This was my very first Pinterest recipe and it was so good that I just had to make it again this year. Chocolate, Oreo's, Cream Cheese and Whipped Cream...what more can you ask for in a cake?

 Be prepared, this cake will take some time to prepare! It is not a simple "bake cake, put on icing and serve" type cake. But please do not be discouraged as this cake is worth it with every delicious bite you make!!

There are a lot of ingredients you will need to buy as you have a cake to bake, icing to make and a filling that needs to be whipped up. You have two choices when it comes to the cake and icing...store bought or home made. Either choice is acceptable because, really, the most delicious and important part of this cake is the filling. The recipe calls for boxed cake and home made icing. If you want to make your own icing, then here is a great recipe!

  • 1/3 cup plus 1 Tbsp. cocoa powder
  • 6 Tbsp. butter, softened
  • 4 1/2 cup powdered sugar
  • 1 1/2 tsp. vanilla
  • 5 to 6 Tbsp milk or more if needed


And now for the main event...the Oreo Cream filling!! Here are the steps plus iPhone photos. Filling recipe:

  • 8 oz. reduced fat cream cheese, softened
  • 1/2 cup sugar
  • 2 cups Cool whip (I used the extra creamy kind)
  • 12 oreo cookies, coarsely crushed


Step 1:
Add cream cheese and sugar to a bowl and beat them together with a hand mixer until well blended.

Step 2:
Fold in your whipping cream to the cream cheese and sugar mixture. 
Step 3:
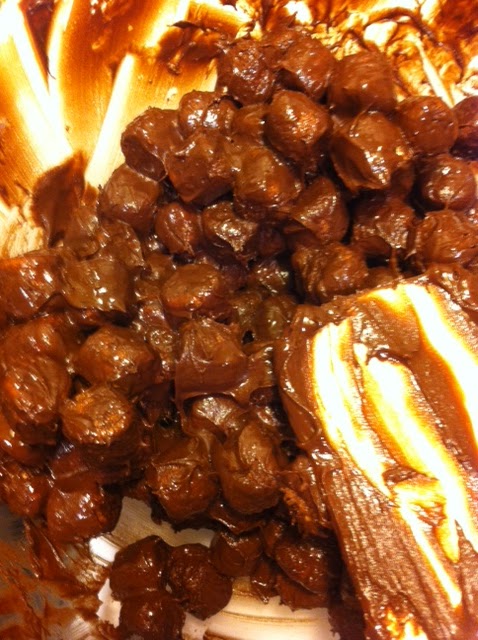
On a cutting board, use a rolling pin to crush up your Oreo's while using every ounce of willpower to not just chow down :p 

Step 4:
Blend in your crushed Oreo's to the cream cheese, sugar and whipped cream mixture. 


 Step 5:
Spread the Oreo Cream filling onto the cooled bottom layer of your cake.

 Step 6:
Place cooled top layer on top. Now you are ready to put the icing on


*Please note that for whatever reason, my icing turned out a lot thicker than usual so my completed cake ended up being one of the ugliest cakes I have ever made!!! The good news; it still tasted delicious so just ignore how bad this cake looks.


 Slice and serve!!!

Rating

Preparation: 9/10...I took the more complicated route as I made my cake batter from scratch and made my own icing. This is not reflected in the preparation score. I am rating the filling itself. This filling recipe is really easy to prepare, but breaking up the Oreo's does take a little time (and a lot of willpower haha). You can make it a head of time and just place it in the fridge until you are ready to place it on the cake.

Taste: 10/10...Like I said above...Chocolate, Oreo's, Cream Cheese and Whipped Cream how could this not taste amazing??!! It is not overly sweet and the whole cake leaves your sweet tooth feeling very very very satisfied.

Servings: 10/10...You can use as much or as little of the filling as you like. It will spread nicely onto any size cake you decide to make so you do not have to worry about running out.

This recipe is a cool 29/30!! There is nothing that I wouldn't really change and believe me...I will be making this filling again and again and again :)

Enjoy Responsibly :)

http://realmomkitchen.com/6917/chocolate-oreo-cream-cake/


Salmon Florentine

You had me at Goat Cheese


 From past blog posts, you all know that I am a huge fish fan! Salmon is one of my favourites to cook up and I make sure I buy a big enough piece that there will be delicious leftovers for lunch the next day. I was looking to make a fancier salmon for a birthday celebration and came across this Salmon Florentine recipe (http://www.self.com/fooddiet/recipes/2009/11/salmon-florentine?mbid=enws_row0326). Honestly, the ingredients list sparked my attention and I thought that it looked and sounded delicious. The recipe was easy to follow so I knew that this was worth a shot!

The recipe called for ricotta, however, I decided to be a bit of a rebel and go with a delicious goat cheese...how can anyone say no to goat cheese?! Here are the ingredients you will need:


  • 2 packages (10 oz each) frozen spinach, thawed
  • 1 tablespoon olive oil
  • 1/4 cup minced shallots
  • 2 teaspoons minced garlic
  • 5 sun-dried tomatoes, chopped
  • 1/2 teaspoon salt, plus more to taste
  • 1/4 teaspoon red pepper flakes
  • 1/4 teaspoon freshly ground black pepper, plus more to taste
  • 1/2 cup part-skim ricotta
  • 4 skinless salmon fillets (6 oz each), rinsed and patted dry


Preparation was very simple!! I had my game face on while cooking this meal so here are step-by-step instructions with photos (iPhone photos...I really need to start pulling out my camera). Please note that if you decide to use frozen spinach, you need to defrost and drain it first.

Step 1:
Heat oil in a large pan and add your sliced green onion (shallots). Make sure you keep stirring the shallots for about 3 minutes or until soft.

Step 2:
Add garlic and spinach to the soften shallots and oil. Stir them until they all mix in together.

Step 3:
Add sun dried tomato pieces along with salt and black pepper. Stir everything together and cook for another 2-3 minutes.


Step 4:
Take spinach mixture off of heat and add some goat (or ricotta) cheese to mixture. It will melt into the spinach mixture as you stir.
Step 5:
Place your salmon on top of a drizzle of olive oil in a baking dish. I squeezed some fresh lime juice on top of the salmon plus added a little lemon dill seasoning. I did not add much seasoning to the salmon, just enough to put a very fine layer on. Pile on the spinach mixture on top if your salmon and spread it so that the spinach covers the salmon. I took the rest of the goat cheese (I had purchased a small package) and sprinkled it on top of the spinach mix. I found that it makes this recipe looked finished and nothing wrong with a little extra goat cheese :p

 Step 6:
Place salmon in oven. Here is a trick to cooking fish...are you ready??!! DO NOT PREHEAT YOUR OVEN. I put my salmon into a cold oven and turned on the heat to 425 for 30-35 minutes. I have found that not preheating the oven makes the salmon taste super fresh and keeps it from drying out. I cooked a very large and thick piece of salmon, so please note that heat and cooking times will vary depending on your oven as well as the size and thickness of the salmon you are cooking. Heat and cooking times also depends on whether or not your fish is boneless or bone-in. I always buy boneless fish because I have this massive (possibly irrational) fear of choking on fish bones.

Once your salmon is ready, cut into desired piece size and then plate and enjoy!! I served my salmon with a side of honey lime shrimp (see blog post from March 15 for recipe) on rice and Caprese Salad (blog to come!!)

Rating:

Preparation: 8/10...There were very few steps in preparing this salmon recipe, however, you really need to make sure your spinach is completely defrosted and drained (if you choose to use frozen spinach). I could see the extra moisture causing some consistency issues with this dish. If you use frozen spinach, you will have to plan to make it as you will need to take out the spinach before you head off to work or school. There is a lot of chopping (shallots, sun-dried tomatoes and garlic) but they do not take long. Cooking the spinach topping is quick and easy with very little clean-up.

Taste: 9.5/10...This was almost perfection! I think next time I will add a little fresh squeezed lemon juice to the spinach topping just for a little extra taste.

Servings: 10/10...Even though this was for a dinner party, there was still left-overs for my lunch at work the next day. I actually placed a piece on top of salad with a raspberry dressing.

Out of a possible 30, this recipe was a solid 27.5!! Where it loses points is in the preparation and only because it is not a quick and delicious throw together meal due to your spinach needing to defrost and drain completely first.

Enjoy!!


Friday, March 15, 2013

Honey Lime Shrimp

At the end of February, my Mamma celebrated her 57th birthday and we celebrated by having family over for dinner and cake. She asked me to cook so of course I had to make this a pinterest recipe affair!! 

This is the first of 4 blogs from this night. Look out for a cake, some salmon and a blended alcohol free drink that will wake up your taste-buds.

Since we were having salmon, I decide that a side of shrimp and rice was needed! I had come across a pin for a very simple Honey Lime Shrimp recipe and thought it was a great time to try it out.

This is a very simple recipe with very delicious results. Here is the recipe:
1/2 pound large shrimp, peeled and deveined
1/4 cup olive oil
2 T honey
juice of one small lime, or half a large lime (2-3 T)
zest of one small lime, or half a large lime
2 cloves garlic, smashed
1/2 tsp kosher salt
1/4 tsp black pepper
1/4 tsp red pepper flakes

Here are the directions:

1.) In a large ziploc bag, combine all the marinade ingredients. When everything is well-combined, add the shrimp, squeeze as much air as possible out of the bag, and close it up. Place it in the fridge.
2.) Let the shrimp marinate for 30-60 minutes, flipping the bag around once or twice during that time, so that all the shrimp stay evenly covered in the marinade.
3.) When you’re ready to cook, take the shrimp out of the fridge and let them sit at room temperature for about 10 minutes. Heat a large skillet over medium-high heat; there is no need to add any oil or butter to the pan, as the marinade has enough oil in it to keep the shrimp from sticking to the pan. (If you would prefer to use the grill for these, you can thread them onto skewers and toss them on the grill at this point.)
4.) Add your shrimp to the pan in a single layer, making sure they are not too crowded; you can always cook them in more than one batch. Let them cook on one side for about a minute, until they curl up and start to turn pink. Flip them over, and cook for another 30 seconds or so, until the shrimp are opaque. Remove from the pan, and serve immediately!


This is what I did. I de-shelled the shrimp before preparing them to be marinated. My 3.5 year old daughter is a huge shrimp monster so I like them to be shell free before she digs in. I ran them under cold water for about 5 minutes. I then drained the water and placed the shrimp into a bowl. I added olive oil, honey, garlic and lemon zest. I then cut up 3 small limes and squeezed the juices in. Once everything was added I stirred them around a bit, covered them and threw them in the fridge until I was ready to cook them.

They took less than 10 minutes to cook up. I served them over brown rice and added a little sauce to them once they were platted. I can tell you that by the end of dinner, there was not one piece of shrimp to be found. My daughter even started stealing them from our plates!

This recipe is very versatile! You can serve them as an appetizer all on their own, add to a summer salad or serve as a side with a meal. They were so good that I have a bowl of them sitting in my fridge marinating for a little get together I am having tomorrow.

Rating:

Preparation: 10/10...Simple ingredients, very little preparation needed for the shrimp and everything just goes into one bowl! Stir it up a little, refrigerate until you are ready to cook them and you are good to go.

Taste: 10/10...When your first fork full hits your mouth, all you can say is "YUM." No, I am serious!! Everyone at the table said "yum." They are a nice mixture of sweet and sour, and if you are not a huge shrimp fan, they do not have that "shrimpy" taste.

Servings: 10/10...We were left wanting more, but not because there wasn't enough. I had doubled the recipe because I was feeding more than two (the recipe is for 2 servings). This recipe is very versatile so you can make enough to serve however many people you are hosting.

This recipe was a perfect 10/10! I do not feel like it needs something else added to it and I love that it could be served as an appetizer or as a meal. This recipe is worth making again and again and again!!

bone appetite!!

Thursday, February 28, 2013

Quick Cheese Danish

Last night I wanted something sweet and simple for after dinner tea. I remembered pinning a cheese danish recipe ages ago, and decided I would give it try.

Warning: No brain power required. Roll. Spread. Bake.


What you'll need:
1 Pillsbury crescent roll
8 ounces softened cream cheese
1/2 cup granulated sugar (I did not use that much sugar, add a bit of sugar at a time until you reach the sweetness you desire... 1/2 seems like a lot)
1 tsp vanilla extract
3 tbsp flour (again, I did not use that much flour. Just enough so my cheese wasn't a thick unspreadable paste)
1 cup fruit/filling (optional)

For the icing:
1/2 cup powered sugar
2 tbsp milk or cream
1/8 tsp vanilla extract

Method:
Preheat oven to 350

Blend cheese, sugar, vanilla, and flour. Set aside.

Line your cookie sheet with parchment paper. Roll out the crescent on the parchment paper (I split them in half, so two croissant pieces comprised the bottom layer, and the remaining two comprised the top layer; each layer was perfectly square). You can also leave it completely intact, in which case you would then have a rectangle shape of dough on your cookie sheet.

Spread the cheese all over the bottom layer of dough. If you are doing 1 strip of dough, spread the cheese down the middle. Top the cheese with your fruit/filling of choice.

Add the top layer of dough and gently pinch around. For the second method, cut 1/2 strips along either side of the cheese/fruit. Fold the "dough arms" over the center, alternating either side as you go along. The idea is to achieve a braided look.

Pop your pastry in the oven and bake for 15-20 minutes. Or, until golden brown.

Once your pastry is out of the oven and cooling, whip together your icing by combining all ingredients. If it's too thick add the slightest dash of cream, too runny add more sugar.

Once the pastry is cooled completely, either drizzle the icing over top or, as I did, completely smother your pastry in icing.

My review: 
I'm not sure if I'm a fan of this. I mean it was good, but it wasn't great. Perhaps I'm a food snob and my taste has been spoiled by much finer pastries. But, to kill a sweet craving, this would do the job. 

The icing sugar was not overpowering, as it often can be. I didn't add enough cheese to mine, so if I make it again definitely will do so. Also, if I use this recipe again, I will switch the croissant for puff pastry. I'm not much a fan of pre-packaged croissant, they're nothing like those gloriously overwhelming puffy croissants you get at the bakery. 

All in all, would not make this recipe to serve to others as it's just "okay"... there's no "my mouth has just discovered heaven" moment. 

~Alea 

Recipe from Bacon Avec Bacon

Wednesday, February 27, 2013

Zuppa Toscana

This is one of my favourite soups to cook. If you've been to an Olive Garden restaurant, you've seen this soup on the menu, and yes it tastes exactly like Olive Gardens version! It's pretty simple to make, doesn't require a very long cooking time; it's not an all day ordeal. 


Here's what you'll need 


1 lb bulk mild italian sausage
1 1/4 tsp crushed red pepper flakes
4 slices bacon, cut into 1/2 inch pieces
1 large onion, diced
1 tbsp minced garlic
5 cans chicken broth 
6 potatoes thinly sliced or cubed 
1 cup heavy cream 
1 bunch of kale, stems removed 


Method:
Cook the Italian sausage and red pepper flakes in a Dutch oven over medium-high heat until crumbly, browned, and no longer pink, 10 to 15 minutes. Drain and set aside.

Cook the bacon in the same Dutch oven over medium heat until crisp, about 10 minutes. Drain, leaving a few tablespoons of drippings with the bacon in the bottom of the Dutch oven. Stir in the onions and garlic; cook until onions are soft and translucent, about 5 minutes.

Pour the chicken broth into the Dutch oven with the bacon and onion mixture; bring to a boil over high heat. Add the potatoes, and boil until fork tender, about 20 minutes. Reduce the heat to medium and stir in the heavy cream and the cooked sausage; heat through. Mix the kale into the soup just before serving.

* I added the cream in individual bowls. 

Et voila, super delicious Zuppa Toscana 


~ Alea

Saturday, February 9, 2013

Tater Tot Breakfast Casserole


 Breakfast typically consists of a bowl of cereal or toast with peanut butter or a bowl of fruit, except for weekends when I try to make something different and hearty for either Saturday or Sunday morning depending on my work schedule. I came across this pin for Tater Tot Casserole quite a while ago. I have thought about making it but I tended to just skip over it when deciding what recipe to try next. 

I was meal planning the other evening for the coming weeks grocery trip and decided that this weekend was this casserole's week to shine. 

Tater tots are a treat around here for sure. I love them, but I don't think they are the healthiest of breakfast food so they tend to get passed while shopping. I guess I should add, its rare that I hit the frozen food sections while shopping because I enjoy cooking from scratch. My daughter was quite excited when we entered the frozen foods section of the grocery store and her face lit up when she realized that her Mommy was actually purchasing tater tots (I also picked up one of those McCain pizza's...poor girl could hardly contain her excitement haha).

This morning turned into the perfect morning to give this recipe a try. It takes about an hour to bake and I ended up being woken up early by neighbours who had one of those truck carpet cleaning company's parked nicely outside of my room. 7:30 am on a Saturday, gee...thanks. With the rest of the house still asleep, I headed down to begin.

I typically use a recipe as a guideline and add whatever I like to what I am making. I decided to prep my eggs like I do when I scramble them. In a bowl, I mixed the eggs with a little Worcester sauce, garlic powder, onion powder, salt and pepper to taste. I then added the milk and a touch of hot sauce. Yes, this girl adds hot sauce to her eggs...shocking I know considering I am a wimp when it comes to spicy foods. This is what my eggs looked like before being added to the dish.

I spread some butter on the bottom and sides of the casserole dish, to prevent it all from sticking while baking. I then poured the egg into the dish and added my graded cheese. 

This is when you layer your tater tots on top. Don't push down on them too much or else the begin to sink in. 
I decided to be a bit of a rebel and put another layer of cheese on top of the first layer of tater tots and...added ANOTHER layer of tater tots on top. With the one layer, it did not look complete. And heck, its a casserole, you can do whatever you want with casseroles :p

On top of the second layer of tater tots, I graded a little more cheese, stuck the dish into the oven, which was preheated to 350, and set the timer for 1 hour. I left the casserole uncovered because I wanted the tater tots to become crunchy and not soft and soggy.
As soon as the casserole was in the oven, my little monkey awoke. I put on a pot of coffee and we just hung out waiting for breakfast to be finished. It started to smell really good!! So of course, drooling commenced (hypothetical drooling of course).

After an hour, the timer went off and it was time to serve and eat. 

First bite in, I knew we had found a winner!! This is such a nice breakfast treat. However, next time I will add some bacon. It felt like bacon was the only thing missing from this dish. It was filling, but in a satisfied full and not an overstuffed full. My daughter ate it up as well and she is not always a breakfast fan. I served it with a side of sliced banana's, yoghurt and a glass of fresh squeezed (home made) orange juice.

Ingredients:

This is a half recipe...
6 eggs
1/4 cup milk
butter
shredded swiss cheese
shredded cheddar cheese
salt
pepper
dry mustard
tater tots


Instructions:
Whip together the eggs and milk. Add salt, pepper and dry mustard. Pour it into a buttered 9 inch square casserole dish. Sprinkle on the cheese. Carefully place tots on top of the cheese. Bake for 1 hour at 350 degrees.

Rating:

Preparation: 9/10...This was easy to prepare. Prep took just under 10 minutes which for a morning meal, is simple enough. It takes one hour to cook and this is where it lost the perfect score. You will have to plan for this meal and make it at a time where people are not needing or expecting breakfast right away. It is worth the wait though!

Taste: 9/10...Honestly, bacon should be included on the ingredients list because it would make this recipe a perfect 10!!

Servings: 10/10...It yielded more than enough and there was plenty left over for breakfast tomorrow or for Monday morning when it is nice to have something you can throw in the microwave and heat while you finish getting ready to head out the door. It would also be a great addition to a brunch get together.

This recipe gets a nice 28 out of 30. It is versatile as well because you can add pretty much whatever you'd like to it. Peppers, mushrooms, different cheeses, bacon, etc...The list is endless! 

Enjoy :)
  

Here is the website:
http://www.ljcfyi.com/2011/10/tater-tot-breakfast-casserole.html

Thursday, February 7, 2013

Weight Watchers Chocolate Marshmallow Bark

Go ahead and drool a little :)
On Sunday evening, I had a major chocolate craving that needed to be dealt with. The laundry was done, my kiddo was in bed and I had a movie calling my name. However, trying to make better food choices (including snacks and cravings) I searched pinterest for a healthy chocolate treat. I found a pin for Weight Watchers Chocolate Marshmallow Bark and pegged this as the recipe that would kill my chocolate craving.

Due to the baking frenzy from Christmas, I still had an unopened package of mini-marshmallows plus a large bag of chocolate chips sitting in the pantry waiting to be made into something delicious. 

Simple ingredients list:


The instructions are as follows, including some yummy looking images :)

1) Line a 9x9 inch pan with aluminium foil.

2) In a double boiler, melt chocolate and butter over medium heat, stirring occasionally, until thoroughly combined.

Before the chocolate melted

Melting Frenzy!!

Ready for marshmallows...
3) Remove from heat and add marshmallows. Stir until marshmallows are coated in chocolate.
Looking good!!

3) Scrape chocolate and marshmallow mixture into prepared pan using a spatula; smooth into a somewhat even layer. Refrigerate until chocolate sets, at least 1 hour; keep refrigerated until ready to eat. Cut into 12 pieces and serve.
Before Chocolate is set
 Notes:
This basic recipe is very versatile: You can add your own favorite ingredients like nuts, dried fruit, crispy cereal, crisp crumbled cookies or even fresh fruit. If you use fresh fruit, however, the bark must be refrigerated and eaten the day it is made. Fresh strawberries, blueberries and pineapple are all excellent options (any additions to recipe could affect PointsPlus values).

I took the bark out of the tin foil before cutting. I figured it would not leave pieces of tin foil on the bark. I also kept the bark in the fridge between helpings as I enjoy a cold piece of chocolate.

This recipe was really good! It was not too sweet and filled my craving for chocolate. If you follow a Weight Watchers point system, a piece of this is only 4 points!

Rating:

Preparation: 9/10...This recipe took about 10 minutes to prepare, and less than an hour to fully set. It was very easy to prepare. I do not own a double boiler, and if you happen to be in this position as well, all you need to use is a pot filled with water and a glass bowl over top. Boil water and then place in ingredients. It works just as well so no need to run out to purchase a double boiler.

Taste: 9/10...Although this recipe was delicious, I think next time I will add a drop of vanilla to it. I think it will bring the taste of the ingredients together a little better. However, your taste buds will surely enjoy this recipe even without a touch of vanilla.

Servings: 10/10...Unless you are having a party, this recipe yields plenty. I had my craving satisfied, had a treat for my daughter the next afternoon, and even brought some to work for my co-workers to enjoy and still had more than enough left over to munch on over a few days. If you are having a large get together, I highly suggest making 2 pans because this will be a crowd pleaser!

Overall, I give this recipe a 28 out of 30. Its delicious, pretty much guilt free (of course you have to keep how much you have at one time within reason) and was easy to prepare. I like that you can add pretty much whatever you feel to this recipe as well, which is always an added bonus.  

So, go ahead and indulge!!!
(Not my Image. From website below)
Chocolate Marshmallow Bark

Here is the website for this recipe:
http://weightwatchers.com/food/rcp/RecipePage.aspx?recipeId=143841