I admit, I cheated a little when it came to this blog post because this wasn't the first time I have made this cake. I made it over a year ago for a friend of mine's birthday. This was my very first Pinterest recipe and it was so good that I just had to make it again this year. Chocolate, Oreo's, Cream Cheese and Whipped Cream...what more can you ask for in a cake?
Be prepared, this cake will take some time to prepare! It is not a simple "bake cake, put on icing and serve" type cake. But please do not be discouraged as this cake is worth it with every delicious bite you make!!
There are a lot of ingredients you will need to buy as you have a cake to bake, icing to make and a filling that needs to be whipped up. You have two choices when it comes to the cake and icing...store bought or home made. Either choice is acceptable because, really, the most delicious and important part of this cake is the filling. The recipe calls for boxed cake and home made icing. If you want to make your own icing, then here is a great recipe!
- 1/3 cup plus 1 Tbsp. cocoa powder
- 6 Tbsp. butter, softened
- 4 1/2 cup powdered sugar
- 1 1/2 tsp. vanilla
- 5 to 6 Tbsp milk or more if needed
And now for the main event...the Oreo Cream filling!! Here are the steps plus iPhone photos. Filling recipe:
- 8 oz. reduced fat cream cheese, softened
- 1/2 cup sugar
- 2 cups Cool whip (I used the extra creamy kind)
- 12 oreo cookies, coarsely crushed
Step 1:
Add cream cheese and sugar to a bowl and beat them together with a hand mixer until well blended.
Step 2:
Fold in your whipping cream to the cream cheese and sugar mixture.
Step 3:
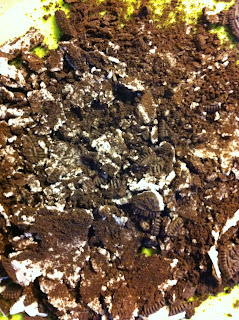
On a cutting board, use a rolling pin to crush up your Oreo's while using every ounce of willpower to not just chow down :p
Step 4:
Blend in your crushed Oreo's to the cream cheese, sugar and whipped cream mixture.
Spread the Oreo Cream filling onto the cooled bottom layer of your cake.
Step 6:
Place cooled top layer on top. Now you are ready to put the icing on
*Please note that for whatever reason, my icing turned out a lot thicker than usual so my completed cake ended up being one of the ugliest cakes I have ever made!!! The good news; it still tasted delicious so just ignore how bad this cake looks.
Rating
Preparation: 9/10...I took the more complicated route as I made my cake batter from scratch and made my own icing. This is not reflected in the preparation score. I am rating the filling itself. This filling recipe is really easy to prepare, but breaking up the Oreo's does take a little time (and a lot of willpower haha). You can make it a head of time and just place it in the fridge until you are ready to place it on the cake.
Taste: 10/10...Like I said above...Chocolate, Oreo's, Cream Cheese and Whipped Cream how could this not taste amazing??!! It is not overly sweet and the whole cake leaves your sweet tooth feeling very very very satisfied.
Servings: 10/10...You can use as much or as little of the filling as you like. It will spread nicely onto any size cake you decide to make so you do not have to worry about running out.
This recipe is a cool 29/30!! There is nothing that I wouldn't really change and believe me...I will be making this filling again and again and again :)
Enjoy Responsibly :)
http://realmomkitchen.com/6917/chocolate-oreo-cream-cake/


No comments:
Post a Comment